DIY Porcelain Holiday Tree Lights

Hey there! Mandi here. Let’s chat about how we can save some bucks this holiday season by DIY-ing some adorable decorations instead of buying them at Target.
I was so close to dropping $70 on some cute LED holiday trees at Target. Two big ones were already in my cart, and I was reaching for the smaller ones before it hit me—I could totally make these at home for way less. Here’s how you can too!
Make Salt Dough Ornaments with Cookie Cutters

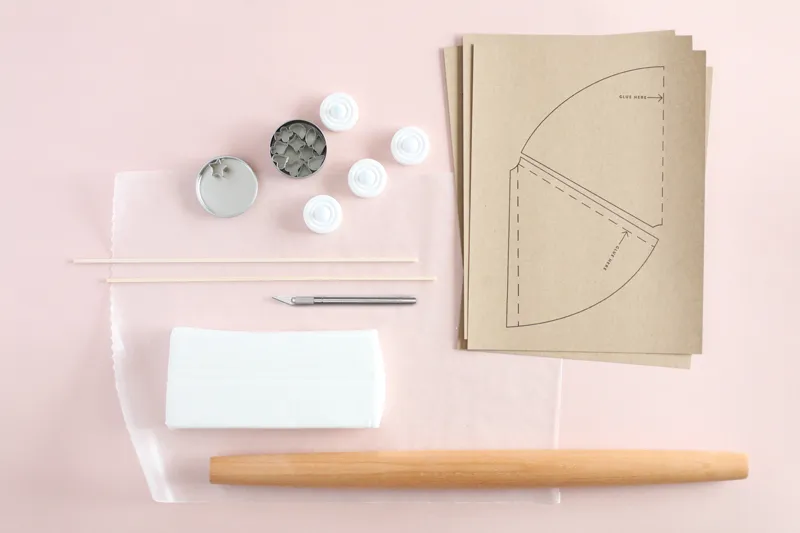
Materials and Supplies
- 8″ cone template (left + right), 6″ cone template, 4″ cone template
- 4 pieces of heavyweight cardstock
- Parchment paper
- Non-stick rolling pin
- Small blade (X-Acto knives work wonders!)
- Star-shaped aspic cutter
- Air-dry porcelain or modeling clay
- 4 LED tea lights
- Wet rag, paper towel, or tiny sponge
- Glue or tape
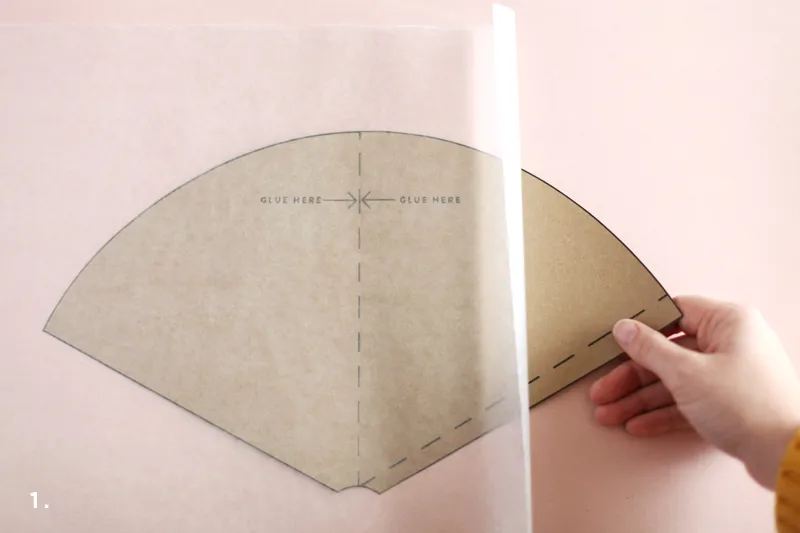
Step 1: Create Your Cone Templates
I’ve whipped up some cone templates you can print onto cardstock and use as guides. Check out the supply list for links. Cut and glue together the large 8″ and medium 6″ cone templates. The smaller 4″ ones come in one piece. Print on 8.5×11″ cardstock and avoid resizing. Hold off on gluing until after step three.
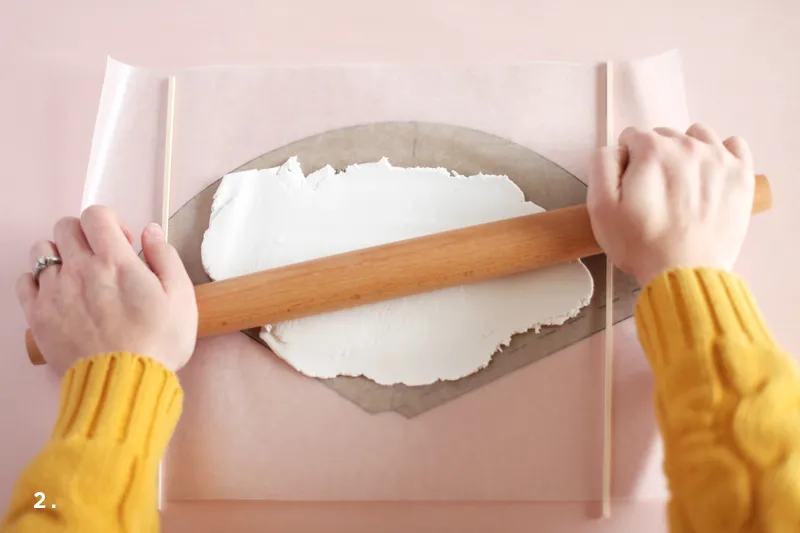
Step 2: Rolling Out the Clay
Place parchment paper over your flat cone template and roll the clay on top to a 1/8″ thickness. Avoid using wax paper (it’s sticky) or aluminum foil (it might tint the clay). If foil is all you have, just use the tinted side on the inside of your cones.
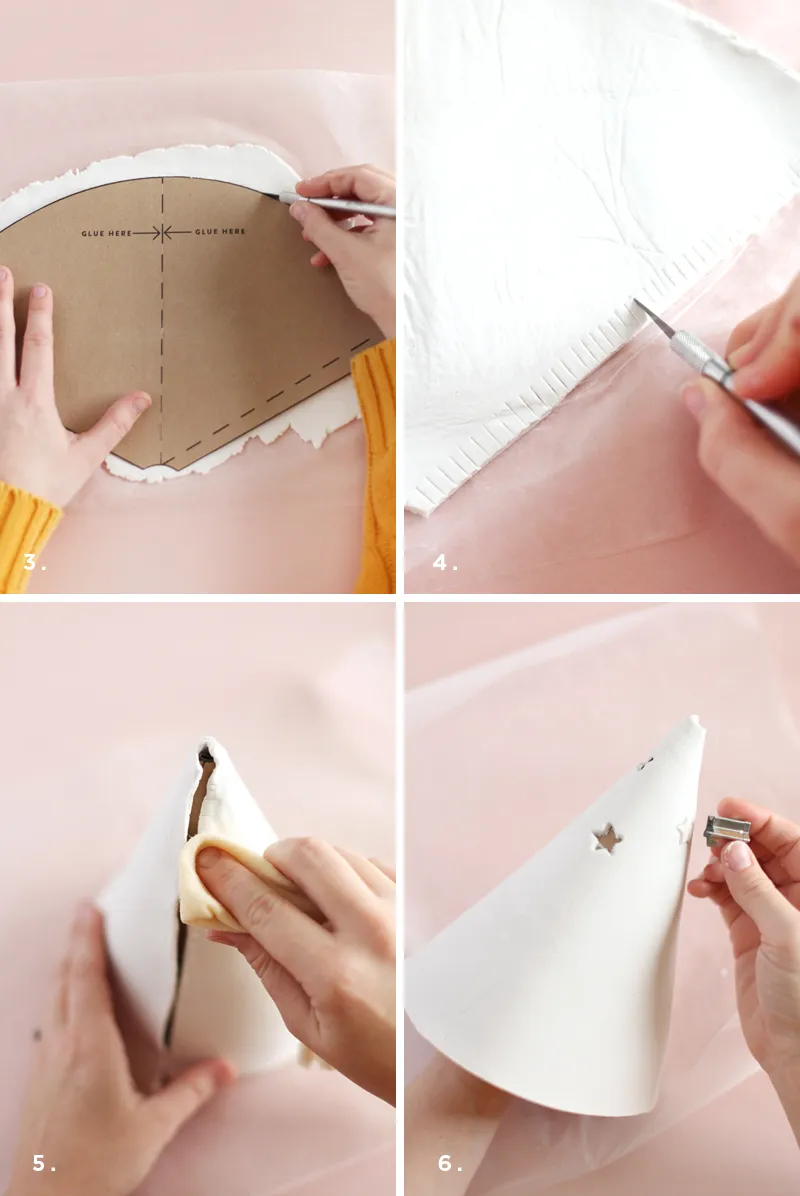
Step 3: Cutting Your Clay
Once you have enough clay rolled out, remove the template from behind the paper and place it on top of the clay. Trim around it with a blade. Keep the excess clay wrapped in a wet paper towel so it doesn’t dry out. Now, you can go ahead and assemble your cone template for the next steps.
Step 4: Wrapping the Clay
Score the edge of the clay you want inside the cone using cross-hatching. Lay the paper cone onto this edge and wrap the clay around the paper cone. If there’s not enough clay, roll out the edges a bit more for overlap.
Step 5: Sealing the Seam
Once the clay is wrapped around the paper cone, cross-hatch the other edge (this time facing outward) and moisten both hatched areas. Using the “score and slip” technique will bind the seam so it doesn’t break when dried. From the outside, smooth the seam with a wet paper towel.
Step 6: Piercing for Light
Press your finger inside the cone where you want to pierce with the star-shaped cutter. Press and wiggle the cutter through the clay. If you mess up, you can use a blade to fix it or start over with a fresh piece of clay.


Let your cones sit on the cardstock scaffolding for about six hours, then remove the cardstock gently and let the clay dry for another 24 hours before handling. You can paint or glaze your trees if you want, but I love the glow of the LED tea lights inside the white clay.
These DIY porcelain tree lights are perfect for decorating a mantle or creating a winter wonderland tablescape for holiday parties. If you’re not in the mood to DIY, the ones at Target are still a gorgeous option. You can even add fairy lights for a magical multiple light glow.